
Control Resonant The Last Taxi: All Taxi Locations and Puzzle Solutions
Last updated 2026-09-28 · Verified against Two recorded quest runs, field maps, and the in-game menus · 10 min read
How do you complete The Last Taxi in Control Resonant?
On this page
Seven yellow taxis are scattered across Manhattan, and each one acts as a paranormal gateway. Entering a cab drops Dylan onto a foggy threshold street where an unanswered payphone rings. Six threshold sectors challenge you with three rounds of spot-the-difference deduction; the Park's taxi is broken down and requires multi-part repair instead. This guide maps every starting cab, breaks down every puzzle round, and shows you how to close out the final call.
All 7 taxi locations at a glance
| Zone | Taxi location | Puzzle |
|---|---|---|
| West Incursion Zone | High parking spot above Empire Avenue Station — climb with Shift | Streetlight rhythm |
| Central | End of the alley west of the Patterned Factory, past the Field Office | Front and back lights |
| Evacuation Zone | Hazard alley near the Evac Building, off Main Street | Headlight rhythm |
| Downtown | Traffic jam at the north end of the Deserted Area road | Proximity roof sign |
| The Park | Upper level of the central parking building, over the mold slope | Taxi repair |
| Underpass | Research-area ledge in the Deeper Underpass | Blackout window |
| Unknown | By the Patterned Evac Building on the southern island | Shadows and a hand light |
Use the locations below to find each cab. If your cab triggers a different challenge, identify its visual clue in the puzzle index by visual clue.
How The Last Taxi works: rounds, rules and mistakes
The way in is the same in every zone:
- Find the taxi. When you get close it honks and flashes its lights, and it shows up on your map and minimap.
- Enter it. The cab delivers you to a threshold — a foggy side-street version of the city.
- Answer the payphone in the back alley. The caller, Mila, is trapped somewhere and asking for help.
- Solve three rounds. Deduce the single correct taxi among the parked vehicles for three rounds. The Park is the exception: you repair the cab instead of choosing one.
- Leave the threshold. A correct pick in round three — or the finished repair at The Park — drops you back in the open world, and that zone's taxi is done.
What happens if you pick the wrong taxi?
Traffic signals over the street confirm the pick: a green light means correct, and flashing red means incorrect.
- A wrong vehicle flashes red and keeps you inside the threshold.
- Green lights you already earned stay lit. The clip below still shows two greens after a miss in round three.
- Walk back down the street and check the remaining vehicles.
Wrong pick vs. abandoning the sequence
A wrong vehicle is not the same as leaving the sequence. From the death screen or the System menu, Abandon resets that taxi and returns you to the open world. Stay in the threshold, and the rounds you already cleared stay cleared.
One more rule before the zones: complete them in any order. The sequence below follows natural zone progression, but each taxi is self-contained. The only gate is access: the Unknown cab requires late-campaign clearance.
West Incursion Zone: streetlight rhythm puzzle
Start at Empire Avenue Station and work toward the high parking structure. The taxi waits at the top, and the approach is a gravity-route climb — Shift along the building faces to reach it.
- West Incursion Zone taxi location circled on the sector map
- The West Incursion Zone taxi at its high parking spot
Focus entirely on the overhead streetlights, ignoring the headlights and cars. Stand back so you can view all fixtures simultaneously. The three rounds:
- Round 1: Enter the vehicle parked under the only streetlight that is flickering while the rest stay solid.
- Round 2: Enter the vehicle under the only streetlight that stays completely steady while the others pulse.
- Round 3: Watch one full cycle. Enter the cab whose overhead lamp stutters out of rhythm during the pause the other streetlights share.
Central: front and back lights puzzle
From the Field Office, head for the alley running west of the Patterned Factory. The taxi sits at the dead end. (The factory itself belongs to another mission — you do not need to touch it for this taxi.)
- Central taxi location circled on the sector map
- The Central taxi at the end of the alley west of the Patterned Factory
Walk around the vehicles to inspect both their front headlights and rear taillights. The three rounds:
- Round 1: Enter the single taxi with active front headlights.
- Round 2: Enter the only taxi with an illuminated yellow TAXI roof sign. Other cars can still have lights on; the roof sign is the mark.
- Round 3: Check both ends of the row. Enter the only vehicle with front headlights and rear taillights on at the same time.
Evacuation Zone: headlight blink rhythm puzzle
Near the Evac Building, look for the alley dressed with red lasers and spikes. The taxi is parked past the hazards — you can work around the rooftops if the ground route is hot.
- Evacuation Zone taxi location circled on the sector map
- The Evacuation Zone taxi in the hazard alley near the Evac Building
This challenge tests headlight blink patterns. Watch a complete flash pattern before committing:
- Round 1: Enter the vehicle whose headlight blink falls out of beat with the rest of the parked line.
- Round 2: Watch for the rapid double-flash: only one vehicle blinks twice in quick succession during each loop.
- Round 3: Enter the vehicle that stays dark and never flashes.
Downtown: proximity roof sign puzzle
Head to the Deserted Area road in the northeast of Downtown. The taxi is stuck in the traffic jam at the north end of the street.
- Downtown taxi location circled on the sector map
- The Downtown taxi at the traffic jam on the Deserted Area road
Vehicles in this sector use proximity sensors and react dynamically as you walk near them:
- Round 1: Enter the single parked cab whose TAXI roof sign is already lit before you walk up to it.
- Round 2: Walk toward the lit signs. Decoy signs go out as you get close. Enter the cab whose roof sign stays lit when you stand beside it.
- Round 3: Walk up to the wrong cars on purpose. Stand next to them and look down the street. Enter the distant taxi whose roof sign lights up because you are standing by the others.
The Park: taxi repair parts and mold puzzle
The Park's taxi sits on the upper level of the central parking building. Cross the building to its back side, climb the blue mold slope, and drop into the upper parking deck.
- The Park taxi location circled on the sector map
- The Park taxi on the upper level of the parking building
- Climb the blue mold slope behind the parking building, arrow added for orientation
- Enter the parking-level passage at the back of the building, arrow added for orientation
Inside this threshold you repair a stripped chassis instead of picking an intact car.
Three-round taxi repair parts and decoy checklist
Leave the blue hood and the police light bar on the floor. Install the parts that match the taxi's yellow body.
- Round 1: Melee-strike the grey mold on the chassis, then install the matching yellow hood and trunk lid.
- Round 2: Refit the yellow front hood and the two wheels. Leave the blue hood where it is.
- Round 3: Destroy the smaller connected growths first, then the central mass they were covering. Install the five matching parts:
- Yellow front hood
- TAXI roof sign
- Yellow front quarter panel
- Trunk lid
- Rear bumper grille
For another objective in The Park, see the Delicious Mold locations and The Collective walkthrough. That hunt is separate from the taxi repair puzzle.
Underpass: blackout window puzzle
The Underpass taxi waits on a ledge in the research area of the Deeper Underpass. The regular route in runs through the Recursions and Iterations mission — once it takes you across the fault, the ledge is within reach.
- Underpass taxi location circled on the sector map
- The Underpass taxi on the research-area ledge
Judge the row only while the overhead tunnel lights are out. Do not pick a cab while the street is fully lit:
- Round 1: When the street goes dark, enter the taxi whose roof sign stays on.
- Round 2: When the blackout hits, enter the taxi that goes completely dark.
- Round 3: During the blackout, enter the cab that stays dark while the streetlights are on, but flashes its roof sign during the blackout.
Unknown: hand light and shadows puzzle
The last taxi is on the southern island by the Patterned Evac Building in the Unknown. The island is tied to late-story progress, so treat this as your finale taxi.
- Unknown taxi location circled on the sector map
- The Unknown taxi near the Patterned Evac Building island
How to read the shadows: taxi silhouette vs. roof sign
Pick up the portable floodlight near the entrance. Each round, light the vehicles from behind so their shadows fall on the wall.
| Round | What to read | Correct vehicle |
|---|---|---|
| Round 1 | Body silhouette | Enter the only vehicle whose shadow is a taxi contour. The decoys cast other vehicle shapes. |
| Rounds 2 and 3 | Roofline | The bodies look the same. Enter the vehicle whose shadow includes the rectangular bump of the TAXI roof sign. |
Puzzle solutions by visual clue (if your order differs)
Why doesn't the puzzle at my taxi match this guide?
Match the puzzle by what you see, not by the zone name alone. If this cab is running a different challenge than the one listed for its district, find that visual clue below. The rules stay with the puzzle type.
| Puzzle type | What to watch | Solve it in |
|---|---|---|
| Streetlight rhythm | The lamps above the cabs: flickering, steady, or out of sync | West Incursion Zone |
| Headlight rhythm | The cars' own lights: out of sync, double flash, or never on | Evacuation Zone |
| Front and back lights | Unique lit headlights; unique lit roof sign; then both ends lit | Central |
| Proximity roof sign | Signs react as you walk up to the cars | Downtown |
| Taxi repair | Clear mold, then refit the matching taxi parts | The Park |
| Blackout window | Behavior changes when the streetlights cut out | Underpass |
| Shadows and a hand light | Read the shadows for a taxi silhouette and roof sign | Unknown |
The final payphone call
After the seventh taxi you are back on the threshold street. Go to the alley and answer the payphone one last time. That call ends the quest.
Mila says she has seen a woman and decides to follow her. The conversation leaves her fate unresolved.
Does The Last Taxi give any rewards? (weapon, trophy, lore)
The ending is that payphone conversation. The footage shows Mila's last transmission. It does not show a weapon form, outfit, or item grant.
For another seven-zone search, follow Every Dog Has Her Day. For a different cross-district collection quest, use The Complete Set speaker locations. For a single-location puzzle in Central, try the laundry puzzle’s washing-machine code.
FAQ
Seven. One taxi waits in each major zone of Manhattan: West Incursion Zone, Central, the Evacuation Zone, Downtown, The Park, the Underpass and the Unknown. Each one opens a threshold street with three rounds of puzzles.
No. The numbering you see in most guides is just a route suggestion. Every taxi is self-contained, so you can solve them in any order as their zones unlock — only the Unknown taxi sits behind late-story progress.
The street flashes red and you stay inside the threshold for another attempt. Your finished rounds are kept — a wrong pick in round three still leaves the green lights you already earned. Abandoning the sequence from the menu is different: that resets the taxi.
Use the location table to find each cab. If your cab triggers a different challenge, identify its visual clue in Puzzle solutions by visual clue.
Whichever you find. Two places to look are West Incursion Zone, near Empire Avenue Station, and Central, past the Field Office. When you get close, a taxi honks and flashes its lights, and it appears on your map and minimap.
The taxi waits by the Patterned Evac Building on the southern island. The island is tied to late-story progress — Sever the Hedron Links — so leave this one for the end of your run.
Answer the last payphone call after the seventh taxi. Mila decides to follow a woman she has seen, but the dialogue leaves her fate unresolved.
Return to the threshold’s alleyway and answer the payphone one final time to hear the concluding dialogue.
Sources
- [1]The Last Taxi full quest recording · Geeky Pastimes
- [2]The Last Taxi taxi 1 recording (Part 5) · FightinCowboy
- [3]Control Resonant The Last Taxi locations and puzzle solutions · Eurogamer · 2026-09-22
- [4]Control Resonant Last Taxi locations and solutions · Game Rant · 2026-09-22
- [5]Control Resonant: The Last Taxi walkthrough · AllThingsHow · 2026-09-22
- [6]Control Resonant Trophy List · Beebom · 2026-09-23
- [7]Control Resonant walkthrough: all main quests and side stories · KeenGamer · 2026-09-23
Related guides
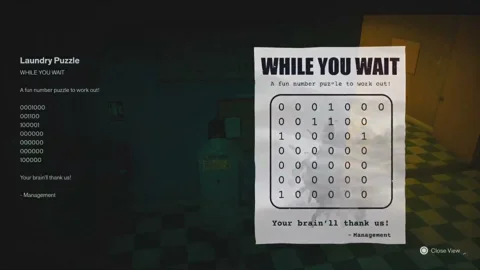
How to Solve the Control Resonant Laundry Puzzle (Wear’Em & Wash’Em)
The Wear’Em & Wash’Em laundromat in Central hides a Health Upgrade Point behind a 0/1 grid. Which machines to switch on, row by row — and how to read it.
Control Resonant Dog and Toy Locations (Every Dog Has Her Day)
Find all 7 dog toy locations in Control Resonant, with maps, routes and return paths. Complete Every Dog Has Her Day and unlock the Dog's Best Friend trophy.
Control Resonant Tips: What to Do First
Start Control Resonant with a clear early-game checklist: reveal maps, find vendors, unlock travel doors, choose upgrades, and prepare for your first Resonant.
Light spoilers